
Tying a Jelly Bean

Tying a Jelly Bean with Thread Shredder Dave Jennings
Material for Tying a Jelly Bean
Hi everyone, Dave here at East Rosebud fly and tackle and Billings, Montana. Welcome, I know it's been a while. The rumors of my early death have been a bit exaggerated... I know, I apologize, it's just that we've been so busy here at the shop, opening two additional stores trying to get all this material crawled up in a POS system, so hopefully I'm back in the saddle here and we can get this to you at least once every month or so. So the first one I'm going to tie for you is actually a fly that I just did as a lark, it appeared in the autumn version of tyer magazine, Barry Ord Clarke, who is a Norwegian tyer in an outstanding tyer. Just outstanding, he had this in the magazine, so I thought, What the heck, I'll give it a try. Well, it's been a top seller here at the shop, so this is called the jelly bean, I don't know the history of this fly, so I don't wanna take anybody's credit for this, I certainly didn't develop it, but it's a cool little fly, it can be tied in a variety of colors, you can use ostrich herl which I'm using here, you could use hackle, you can tie it in any variety of different colors, wires, everything, the key components really are just really scud hook.
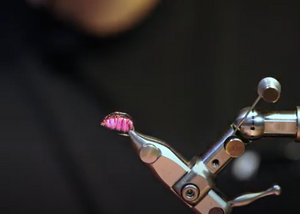
Some type of wire, I'm using a brassy UTC wire, and then the most important part, of course, is the ostrich, and then the topping I'm using solar EZ, this is the medium. The thin is just... Runs too quickly, it's hard to capture and cure before it gets out of hand, and the thick is too thick. So it's kind of like the three bears. This is the one in the middle, there are a couple of different tips which can be used, and fortunately, the ones that loon sells also fits these bottles, so the green one, which they typically sell with the thick or stuff, or this pink one, it's up to you I think the Pink gives me a little bit better control. So that's what we're gonna use. Florescent thread is important. I'm using UTC 140 Florescent pink thread. And we might as well get to work.
Watch Here on East Rosebud Fly and Tackle
Let's Start Tying
Jelly bean
Hook: Daiichi 1120
Thread: Uni 140 Denier
Herl: Ostrich
Wire: Brassie smaller
Resin: Solarez Medium (Use a high quality U.V. Lamp is recommended, cheaper options tend to leave the resin uncured)
Set up your material and tie along with Dave
So we're gonna lay a thread base.
Here, just a little bit around the bend, don't worry too much about a really even thread base, it's gonna be covered with the ostriches, go ahead and flatten your thread, which is a nice characteristic of UTC thread. Then I'm going to take some brassy wire, just a few inches here for one fly.
I am going to tie Wire in on the far side of the hook.
I Think what I'm going to do is lower my chair, how about that? All the way down to the end of your thread base now, since the ostrich doesn't leave much of a footprint, I don't really tie it all the way back up to the eye. Plus the way I do it still going to take about 5 inch here to get this done now, if you run out of ostrich when you're wrapping it, you can certainly phase in a second piece, it's not that big of a deal, but it does take quite a bit of ostrich. When you tie in the ostrich, you wanna make sure that the Quill is against the hook Shank, because we're going to flip this when we wrap it so that the Quill is forward, you'll see how bushy that makes the body. And ostrich is just like peacock in that way. So if you've never done this before with hospice Peacock, you'll be amazed how much it flops out. Well, I said Makes a tie off much cleaner because the Quill will be leading each wrap, so make sure, again, with ostrich and co, the herl does not grow directly off of the sides, it grows in a Y shape pattern.
We wanna make sure we have the actual Quill down against the hook again, so he had me tie it to the back and then I bring my thread forward, and just to get it out of the way, I'm going to hang it on my Bobbin holder.
Now, you can use the rotary function of your hook or your vise, if you'd like on this, I find that until I get around the hook point itself, I like to wrap it by hand to give me more control, or remember what you're wrapping... Here is a spring. So if you let go of this, this is gonna unwind faster than you can come up with a bad word.
So you wanna make sure that when you're winding this, the quill part is leading and the herl is following, that way we get the maximum density... Take your time, particularly at the tip. The here is not that. Thick, it's easy to break. Just.
Continue to wrap this forward and touching wraps.
I'm sure my camera man can speed this up. You do wanna make sure you get it on hackle pliers... Oh, as soon as you can... Again, if you let go of that, the whole thing is going to unwrap, I find it also makes a tie-off more secure, so still the Quill is leading were going to carefully wrap this right behind the eye.
0:06:12.7 S2: This fly is not difficult to tie, it is time consuming in some parts, wrapping this, and also the many layers of solar as I'm going to apply, but it is an easy fly-to tie and it's very effective. I'm sure it's being used for more things than just a Scud...
A couple of wraps to tie that off securely, it can be difficult sometimes when you have a curve to the whip finish wants to slip off. The trick is make sure the barrel of your whip finished tool is on the same plane as the hook itself, then it won't slip off. Now next, I'm going to damp in this and lay this hurl down to the bottom of the fly, the trick here is not to use any more water than you have to, and as you know, I am not a proponent of putting this stuff in my mouth a lot of these dyes are really not all that permanent, so I just have a sponge a little bit of water and just press it down underneath the hook, the wetter you get this, the longer it takes this ostrich to dry, so it does not need to be all that wet. And.
Then using this UV cure resin, you wanna make sure that all of your layers and it's going to take several layers are very, very thin. That's why I'm using this thin or nozzle, and you want it tapered, so make sure that you let off, solarez as recommends a one-second flash cure, but it sit for about 10-second sets to help dissipate some of the heat from that catalytic conversion. And then come back again in 10 seconds.
So as we're building this body up, you wanna make sure it's actually more control of squeezing the bottle than anything, and your placement of your layers.
We wanna make sure we're making a tapered body under body, so my next layer is going to start short of where I started the previous, and I'm going to stop short of where I did the previous, that way we keep the semi-circular shape and keep it... Thin you can always come in with your bodkin, push us around if you don't like words at... And this is part of the time-consuming process is just curing these layers, we want an under layer that's thick enough to where the wire will appear to be floating in between the different layers of resin, and I find that it typically takes me a good three sometimes four under layers until I get the height that will give me that. And.
This particular light from solarez is their most powerful light, you can feel the heat, if I was using any smaller light, I would be carrying it for two or three times longer than I am here.
So our next layer again, we start a little shorter of where we entered the other... Almost there, I'm not sure how well you can see the difference between the actual top of the ostrich and the top of our layers solarez, but it does take a few layers, don't get in a hurry and try to make them thick because before you can get the light on them, they're starting to slide off of the side, which is not really what you want, and you can put your resin either direction... Just depends on what you're comfortable with. Alright, I think that'll be enough. We can wrap our wire next time, and if you've used the minimum amount of moisture when you push this off ostrich down, it'll be almost dry by the time it's time to wrap the wire, and that just makes wrapping the wire that much easier. It goes between the herl and doesn't attract it, that we take our wire... Sometimes you need a bodkin just to make a separation, make as many wraps as you like...
Well, I have tied many, many, dozens of these, or this is about as fast as I can make them, whatever this time is.
So now we'll take a layer over the wire, and because I'm right-handed, I can't see this front side as well, I wanna make sure that I have some UV resin where I have my wire crossing, once again, we hit it with the light off of it, check your wire, and make sure that it's... You can break it off or you can cut it off for what I have found that this UV Cure, even though it's cured, It's not at its maximum hardness, I always put these up in the window for 12 hours or whatever... For the final hardness, I find that if I try to twist the wire off, I end up breaking some of this UV resin off, so I just go ahead and cut it. Now we're just going to make a layer or two just to give this impression of this floating wire really is a fun fly. And one thing you can do to give this fly a little more motion, of course, the motion is in the gills here itself, I impress on all my fly-tying students and movement is the key factor in any fly, it's what fish look for, it's what they've learned, it's a very young fry that if it moves its edible, you can put on a thicker top coat and simply let gravity adjust this resin and give you a more Hump Back shape.
What this does is this makes is unbalanced.
So when you retrieve this slowly through the water, it actually helps to flip this fly, so it just gives it a little bit of extra movement, and if I hadn't told you that, you probably realize that's what that's for.
For... And the final peer is going to be it, so hopefully you could see through the camera how this rib seems to float in a transparent field.
To very, very hardy flies. You can imagine, I can think you're going to lose it long before this thing is going to come apart since it's solid reside, but anyway, give it a try, have some fun. It doesn't take much in the way of materials. Thanks for joining us. If you have any questions or comments, please let us know and we'll see you next time.
- East Rosebud Fly and Tackle

Comments 0